
Home Front Friday: Sew It Up!
Home Front Friday is a regular series that highlights the can do spirit on the Home Front during World War II and illustrates how that spirit is still alive today!
With America’s entrance into World War II, the United States’ market and industry transformed—most industries, from General Motors to General Mills, became about supporting the War effort and the troops overseas. For the textile industry, this meant making uniforms for troops in incredibly diverse climates; the beaches of France, the cold climates of rural Germany, and the vast, tropical Pacific, to be specific.
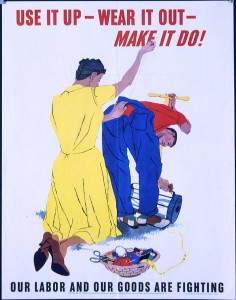
Propaganda Poster Courtesy of the New Hampshire State Library.
For civilian wear, the War Production Board set up mandates that restricted the use of excess fabric for clothing that clothing manufactures could produce. Additionally, there were restrictions on civilians at home; e.g. civilians were restricted from owning more than three pairs of leather shoes per year. Both the industry and the people at home were forced to “wear out” their clothing, so to speak.
In fact, one bride, Joyce Adney, actually had her mother sew her wedding dress from scratch. Because of the continued rationing, Joyce’s mother hand sewed the Japanese parachute silk that her husband, Adrien, had sent home. The Utah couple met at Utah State University, and their wedding photos and her dress can be seen here: Love and War.
Knowing how to sew was incredibly important because it meant less waste and more textiles for the troops abroad. Civilians aided in the war effort tremendously throughout the course of the War, whether it was by rationing food, rubber, or, in this case, fabric.
While no one on staff here at The National WWII Museum is a cobbler, we do know how to sew. Here is a few easy steps on how to sew the hem of your pants, without the machine:
What You’ll Need:
A pair of pants that are too long
Shoes that match your pants
A seam ripper/sharp knife
Straight pins
Ruler
Iron
Chalk
Pinking shears
Needle
Thread that matches your pants’ color
Steps 1 – 5, Measuring & Preparing
Step 1: Carefully cut the old hem out of your pants. To do this, there is a seam ripper tool, but a small and sharp knife will do the trick just as well. Just be sure not to tear the fabric while doing so.
Step 2: Put on your pants with appropriate shoes. If you do this barefoot, you might make the hem too short. So be sure to wear shoes!
Step 3: Cuff your pants to the appropriate length. You want to cuff the excess fabric under your pants, rather than over.
Step 4: Place several straight pins around the cuffs to make sure that the leg stays in place. Make adjustments as necessary, only after walking around the room and looking at yourself in a mirror.
Step 5: Slowly and carefully take off your pants and turn them inside out. It is critical that the pins stay in place so when you’re sewing, you know how long the pants will be hemmed.
Steps 6 – 11, Sewing & Hemming
Step 6: Measure the distance from the edge of the pant legs to the cuff using a ruler. Make sure both pant legs are cuffed to the same length all around, and use straight pins to hold the cuffs in place.
Step 7: Use an iron to make a crease where the pants are cuffed. Make sure the crease is straight!
Step 7.5: You can try the pants on again to make sure that this is where you want them to fall, but that’s completely up to you. If you decide to try them on again, be careful not to stick yourself with the pins!
Step 8: Measure one and a half inches from hemline and mark it with some chalk around the entire leg. Repeat on the other side and with the other leg. This is where the pants will be cut before sewing up the hem.
Step 9: Remove the pins.
Step 10: Slowly cut the fabric along the chalked line, making sure to not come too closely to the hem. When you’re done trimming, use straight pins to pin the fabric back in place about an inch from the hemline. It doesn’t have to be exact, but you could use a ruler to make sure.
Step 11: Sew the hems using a blind stitch technique. What you want to do is sew around the pant leg about a ½ inch from the hem, continuing until you return to where you started. Knot the thread and use scissors to cut. Repeat with the other pants leg. (You can also use a sewing machine for this, but you do not necessarily have to.) When you’re sewing, be sure to space out the thread while sewing so that the hem is not noticeable from the outside!
Step 12: Turn the pants right-side out and iron the hemline again. When you try them one, wear them with the shoes that you expect to usually wear with the pants. If the cuffs need adjustments, rip out the seams and start over! (It’s okay, we messed up the first time too.)
Posted by Catherine Perrone, Education Intern and Lauren Handley, Assistant Director of Education for Public Programs at The National WWII Museum.
- Posted :
- Post Category :
- Tags :
- Follow responses to this entry through the RSS 2.0 feed. You can skip to the end and leave a response. Pinging is currently not allowed.

Leave a Reply