More than prepared: Girl Scouts during WWII
Home Front Friday is a regular series that highlights the can do spirit on the Home Front during World War II and illustrates how that spirit is still alive today!
The Girl Scout way and motto is described simply as “Be Prepared”. However, a more in depth description that was formed in 1947, according to the Girl Scout website, would be as follows:
“A Girl Scout is ready to help out wherever she is needed. Willingness to serve is not enough; you must know how to do the job well, even in an emergency”.
Perhaps that explanation and the year in which it was stated can be attributed to how the Girl Scouts along with the rest of America had just endured World War II and the attitude on the Home Front that was necessary. During the war years, every one’s help was needed and the Girl Scouts took their motto to heart by demonstrating the very Home Front spirit we like to highlight with this blog.
Girl Scouts were involved in helping the war effort in a variety of ways. They helped sell war bonds, tend victory gardens, and scrapped metals and fat to be reused. Girl Scouts also formed “Defense Institutes” for teaching women necessary skills and ways to comfort children during possible air raids. Troupes even made calendars instead of the Girl Scout cookies we all know and love today, so they could help with food rationing.
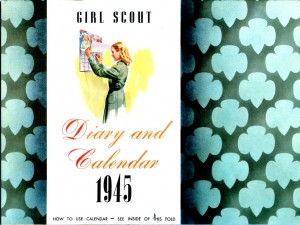
Girl Scout Calendar from 1945. Photo courtesy of the National WWII Museum collection.

Inside of a Girl Scout Calendar. Photo courtesy of the National WWII Museum.
Their uniform even changed its look from a dress with a zipper to one with buttons because of metal shortages.
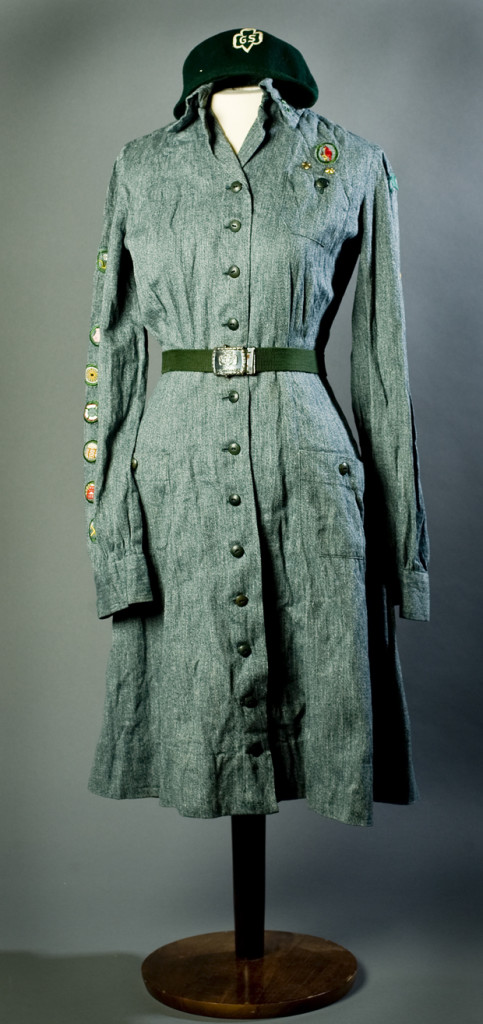
Intermediate Girl Scout Uniform style from 1938-1948. Photo courtesy of the National WWII Museum collection.
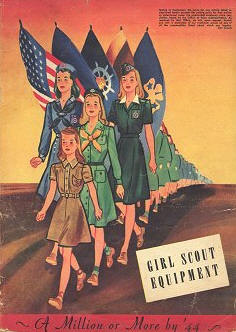
Girl Scout ads and catalog covers also had patriotic themes to them to support the war cause.
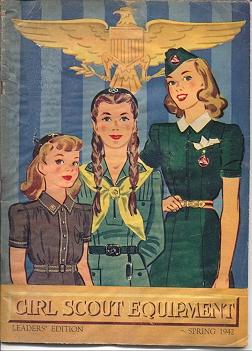
Equipment catalog cover from Spring 1942. Photo courtesy of Vintage Girl Scout website.
Equipment catalog cover from Fall 1943. Photo courtesy of Vintage Girl Scout website.

Newspaper ad. Image courtesy of Vintage Girl Scout website.
The Girl Scouts kept the Home Front positive attitude alive during the war with all of these deeds and patriotism. Just as they are still keeping the same creed and way of helping people to this day. The museum celebrated National Girl Scout Day at the museum last March, where they made rag dolls with the troupes of scouts who visited the museum.
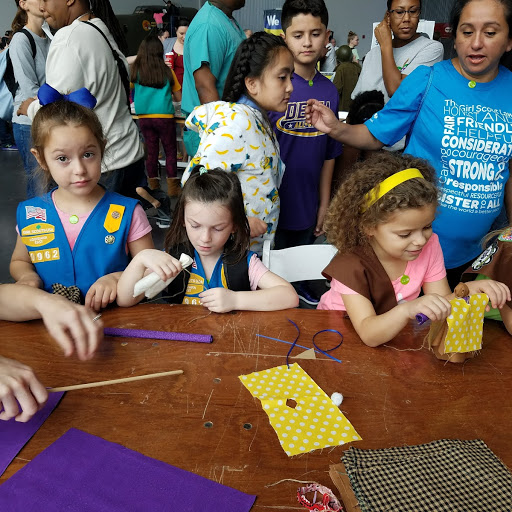
Girl Scout Day at the NWWII Museum. Photo courtesy of Lauren Handley.
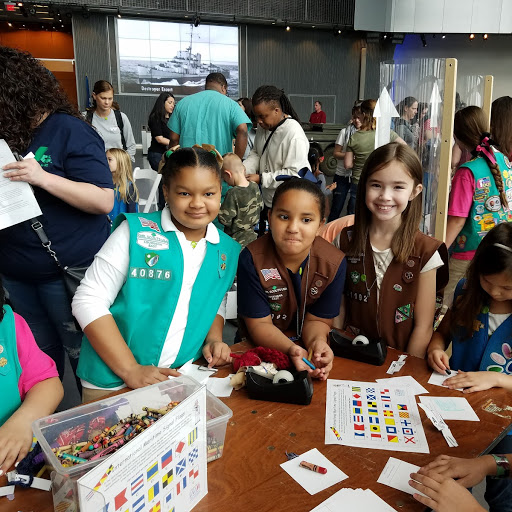
Girl Scout Day at the NWWII Museum. Photo courtesy of Lauren Handley.
The rag doll activity incorporates some of the same ideas Girl Scouts and Americans had on the Home Front during the war by taking commonly found materials like cotton balls and scraps of fabric along with string or ribbon you have lying around and reusing them to make a doll. If you’d like to join in the fun and make a doll of your own, just follow the steps below! You can even help someone much like those Girl Scouts during the war years did by giving the doll to someone of your choosing and brightening their day. The Girl Scout slogan after all is, “Do a good turn daily” .
Rag Doll Instructions
Materials:
- Various lengths of fabric (pillow ticking, camouflage, leaves, red, yellow, black, blue)
- 9×9 inch square of material for head and body
- 13×9 inch rectangle of material for arms
- 9×5 inch square of material for dress/clothing
- 6 inch length of ribbon to secure dress/clothing
- Dowels (small)
- Scissors (dull, safety)
- Twine (or thread)
- Ribbon (various colors)
- Cotton balls or tissue
Step 1: Place the 9×9 inch square of material facing pattern downwards. Place the TWO cotton balls into the middle of the 9×9 inch piece of material.
Step 2: Wrap the material around the cotton balls to create the doll’s head and body.
Step 3: To create the effect of a neck, twist the material beneath the doll’s head and tie a knot to hold it in place with the twine or string. Leave the ends of the string long and loose as they will be used to attach the arms.
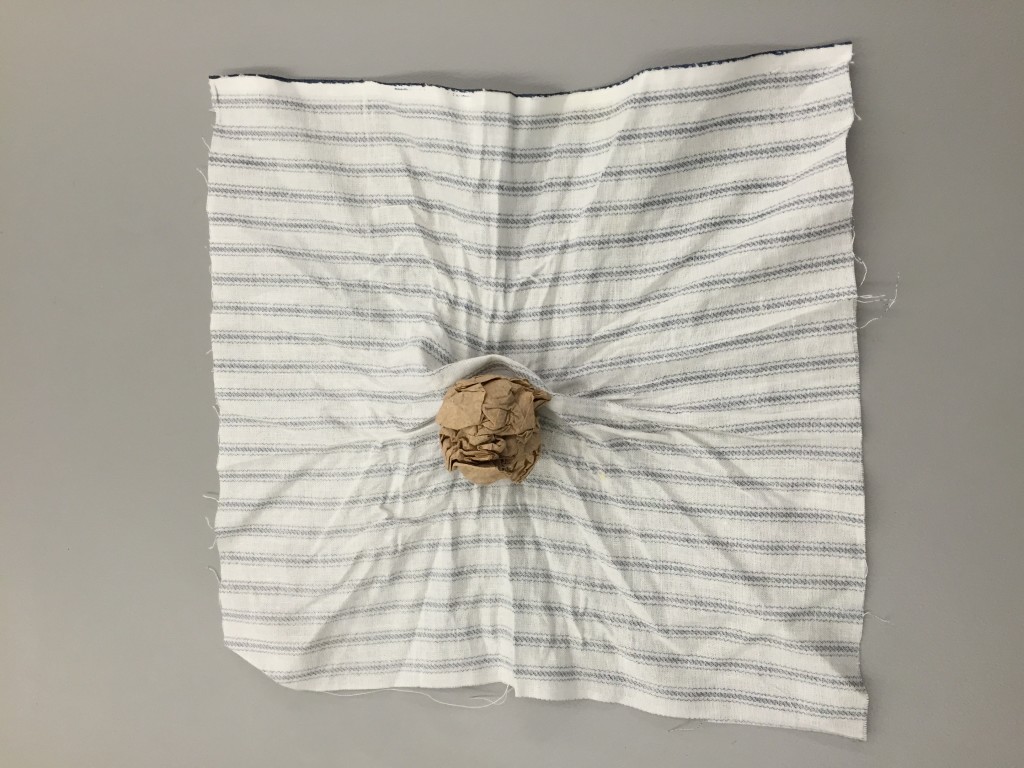
Step 1

Step 2
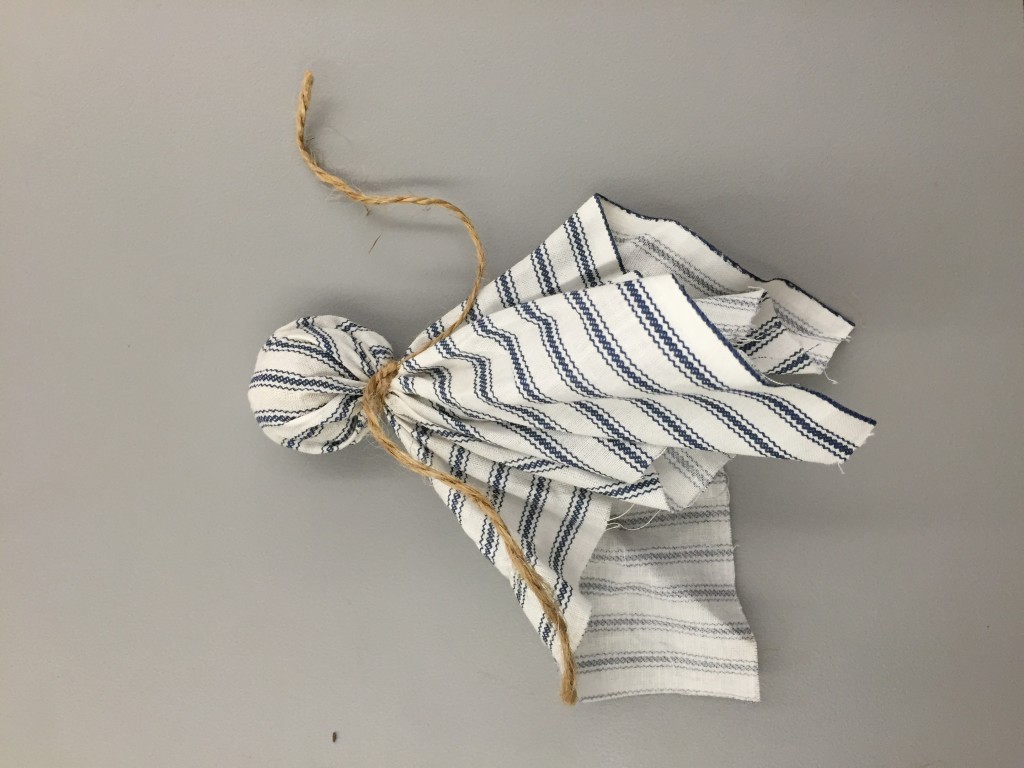
Step 3
Step 4: Place the 13×9 inch rectangle of material facing pattern downwards.
Step 5: Use the small dowel to roll up the material – long-ways – like a carpet.
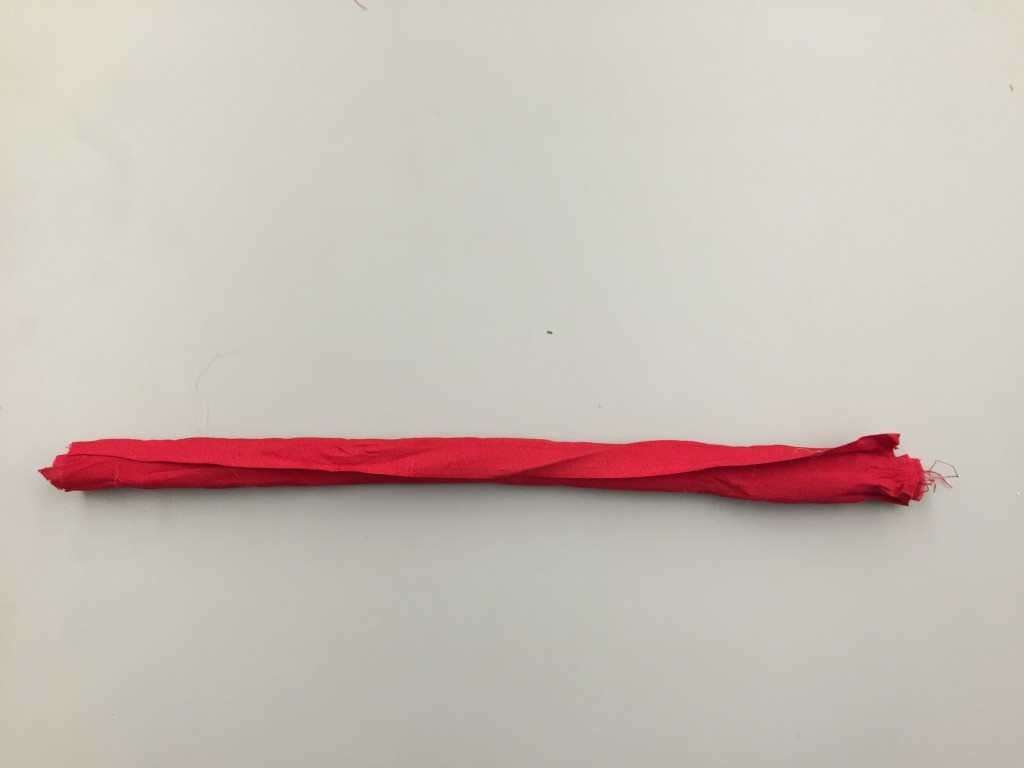
Step 6: After your material is rolled, remove the dowel. This will be your two arms. Tie a knot near each end to create hands.
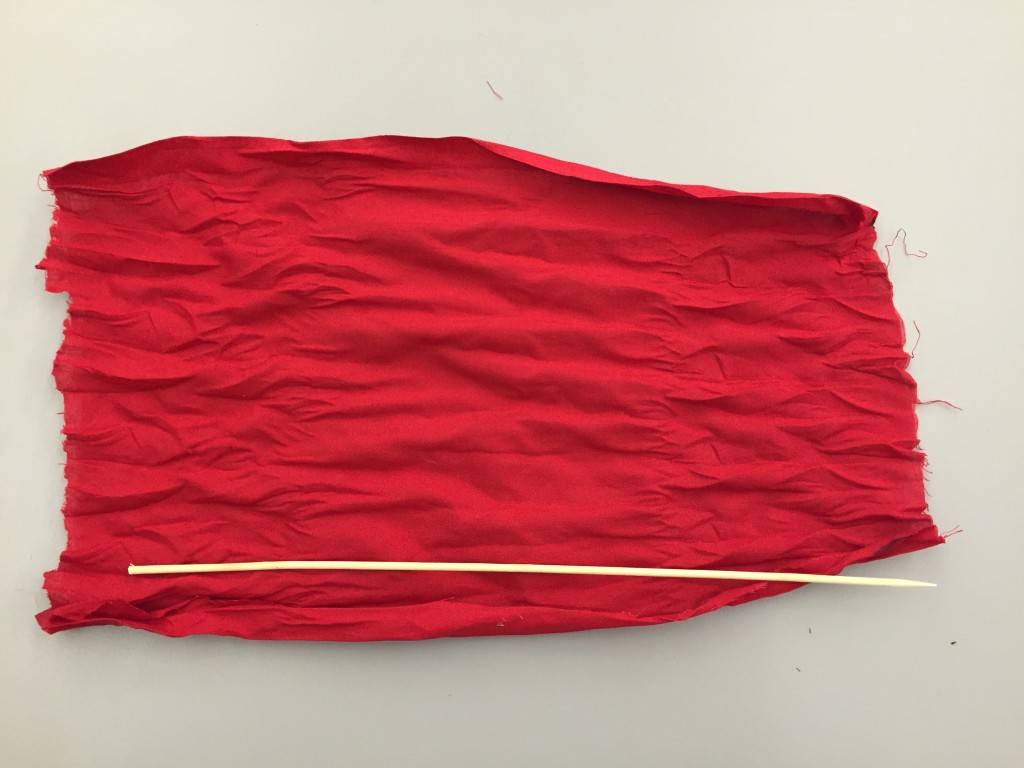
Step 4
Step 5

Step 6
Step 7: Center and place the arms against the knot on the doll’s neck. Use the two long, loose ends of twine to secure the arms in place by crossing them over the arms and across the doll’s chest like a bandolier before tying them into a knot behind the doll’s back.
Step 8: Fold the selected 9×5 piece of material in half and snip a small triangle-shape into the middle of the seam to create a hole for the doll’s head.
Step 9: Unfold the material and slip over the doll’s head.
Step 10: Secure the dress/clothing in place by tying a knot around the doll’s waist using one of the lengths of ribbon.
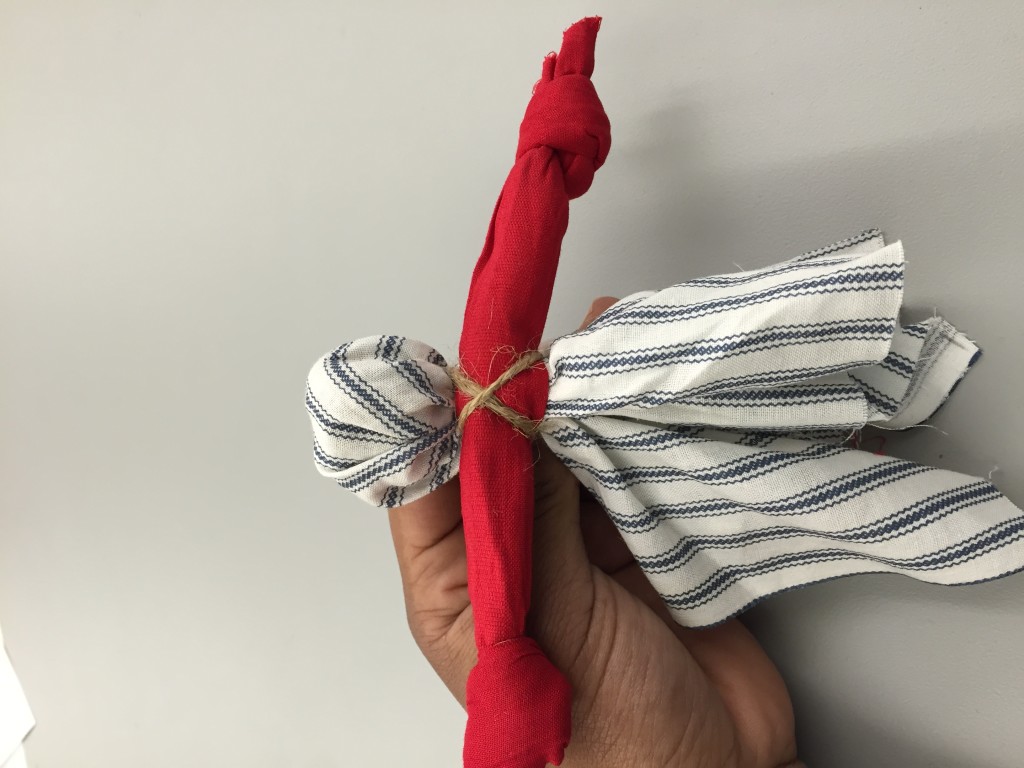
Step 7
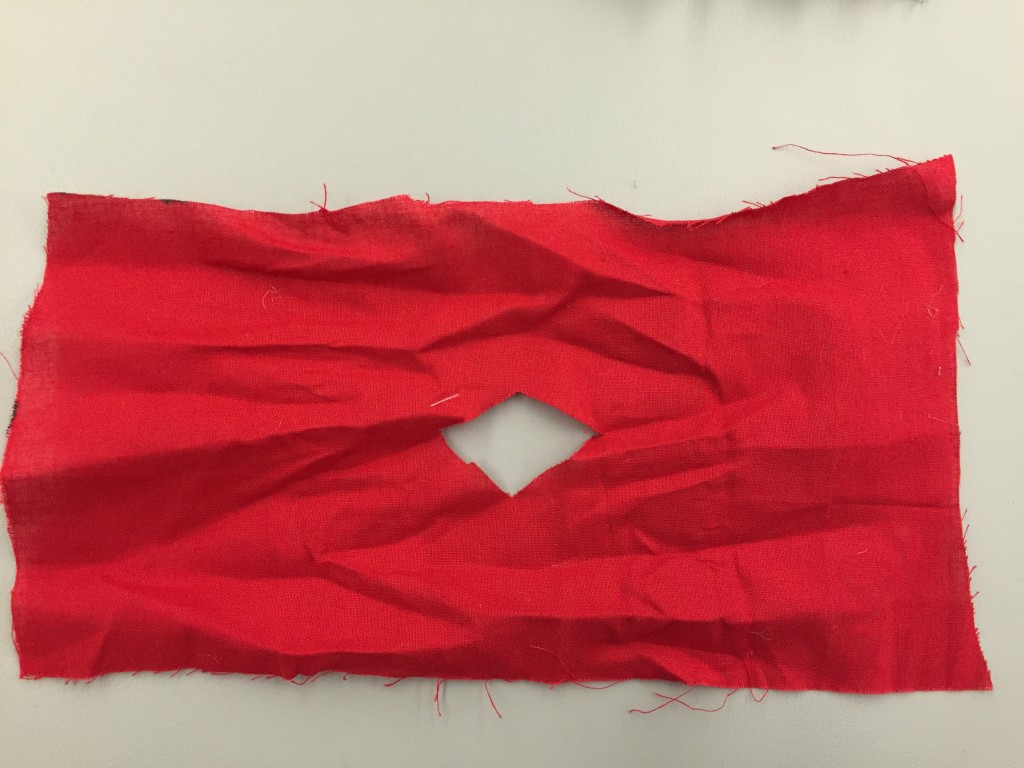
Step 8

Step 9
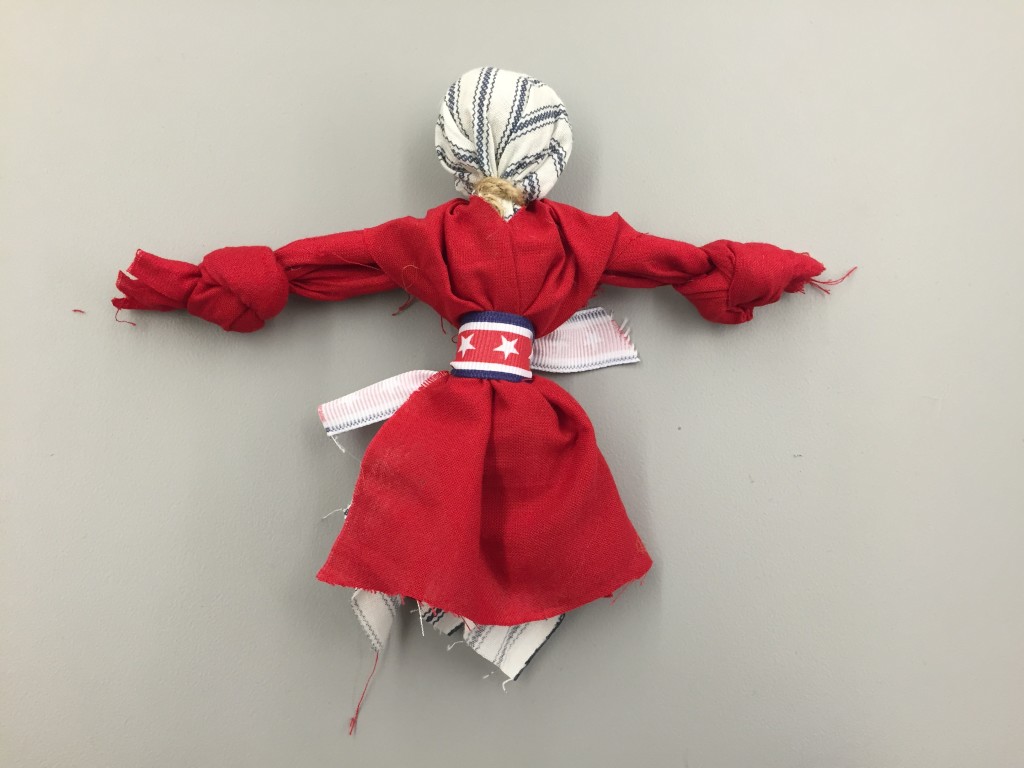
Step 10
Now you’re all done with making your rag doll! Enjoy!
Posted by Savannah Bamburg, Education Intern and Lauren Handley, Assistant Director of Education for Public Programs at The National WWII Museum.
- Posted :
- Post Category :
- Tags : Tags: Home Front
- Follow responses to this entry through the RSS 2.0 feed. Both comments and pings are currently closed.
